Create a pipeline

To create a new pipeline:
  • Open the pipeline in SnapLogic Designer.
  • Configure two or more linked Snaps to orchestrate a flow of data between endpoints.
  1. In Designer, click the Add Icon to open the Add New Pipeline dialog:
    Create pipeline settings
  2. Modify the Label. The names of assets, projects, or project spaces are limited to UTF-8 alphanumeric characters and these special characters. If you plan to save this pipeline to a different project from the one you last accessed, select the path to the target project.
  3. If you are creating an MCP server, select MCP server.
  4. If this is an AgentCreator pipeline, specify the following:
    • Agent: Select if this pipeline is the Agent pipeline.
    • Tool: Select if this pipeline is a tool that will be called by an Agent or MCP Server.
  5. To make this a resumable pipeline, select Resumable Mode checkbox.
  6. Under Error Pipeline Parameters, and add key/value pairs to define the following pipeline.
  7. Under Parameters, click Add Icon, and add key/value pairs to define the following pipeline.
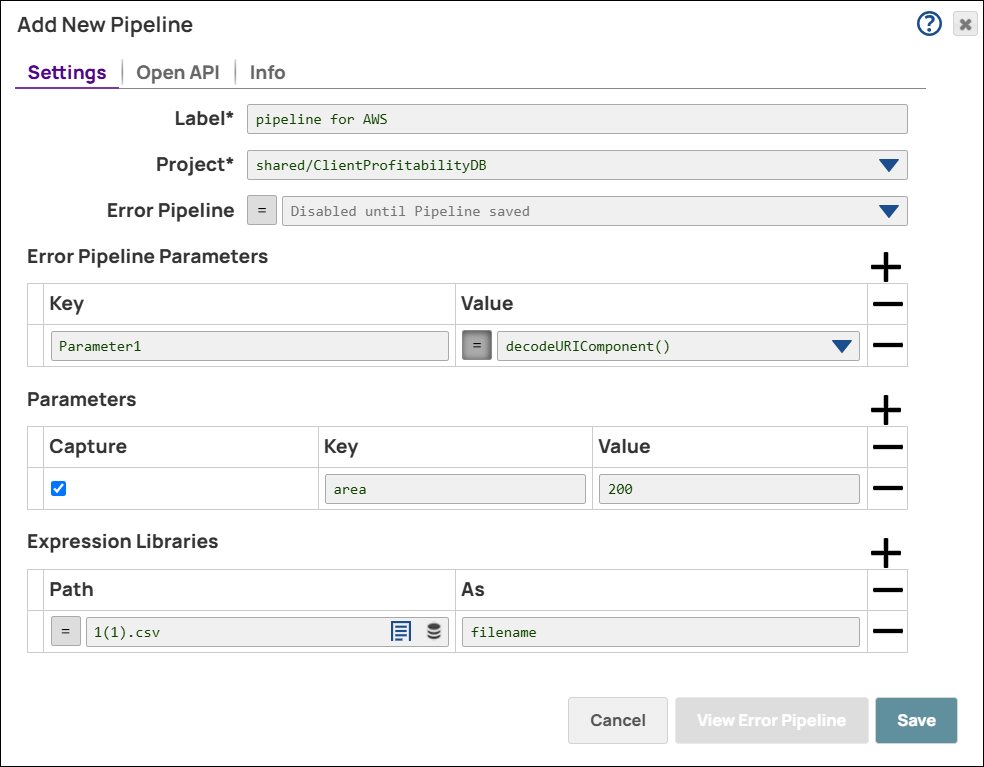
  8. Under Expression Libraries, browse the file by clicking the icon and upload the file.
  9. Click Save. You now have a blank canvas to build your pipeline.
You can use the Snap Reference documentation to do the following:
  • Determine the Snaps you need to use to build your pipeline.
  • Gather account information required to connect to your endpoints.