


Ultra Tasks in production
Planning is required before running your Ultra Tasks in production environments. because Ultra Tasks can be used to serve high throughput and low-latency workloads. Configuring them correctly takes forethought, experimentation, and iterative development to fine-tune their processing of documents.
Dedicated Snaplex
When you deploy your Ultra Tasks in production, we recommend that you use a dedicated Snaplex for the following reasons:
- Guaranteed Performance: By running on a dedicated Snaplex, the pipelines called by the Ultra Task are shielded from the noisy neighbor effect: batch-oriented pipelines that can be resource-intensive, consuming significant CPU and memory. When these run on the same Snaplex as Ultra Tasks, they can cause unpredictable performance degradation and increased latency for the time-sensitive workloads. A dedicated Snaplex ensures that the resources are exclusively available for the continuous and immediate processing needs of Ultra Tasks.
- Enhanced Reliability and High Availability: For many businesses, Ultra Tasks power critical operations such as real-time API responses, streaming data ingestion from IoT devices, or processing financial transactions. Any downtime or performance issue can have a significant business impact. A dedicated Snaplex minimizes the risk of failure.
- Optimized Resource Management and Scalability: Ultra Tasks have a consistent and predictable resource footprint due to their continuous operation. This allows for more precise resource allocation and scaling for the dedicated Snaplex. Administrators can tailor the size and configuration of the Snaplex nodes specifically to the demands of the Ultra Task workloads.
- Simplified Monitoring and Troubleshooting: When Ultra Tasks are isolated, it becomes significantly easier to monitor their performance and troubleshoot any issues that may arise. Performance metrics for a dedicated Snaplex will directly reflect the health and throughput of the real-time pipelines.
High Availability and Disaster Recovery
The Ultra Task Alias field enables high availability and disaster recovery across multiple regions. To use it, create multiple Ultra Tasks for the same pipeline and assign each the same alias value. Assign each Ultra Task to a Snaplex in a different region. When an Ultra Task in one region fails, a Snaplex in another region can run the pipeline by invoking the Ultra Task that shares the same alias.
The following constraints apply when using an alias:
- All Ultra Tasks sharing the alias must run the same pipeline.
- They must reside in the same project folder.
- Each must be deployed to a different Snaplex instance.
Refer to Deployment architecture for configuration details.
Ultra configuration options
For Low-latency Ultra, you can tune Ultra Task performance by specifying the number of pipeline instances to run and the Max In-Flight setting (the maximum number of documents that one instance can process simultaneously). Also, you can specify how many times a pipeline can fail before the Snaplex disables the Ultra Task. Configuration Options describes the fields that control these behaviors: Instances (per Snaplex), Max In-Flight, and Maximum Failures.
When you activate an Ultra Task, the associated Snaplex starts one or more pipeline instances that continuously process documents from a FeedMaster or another message queue. If you modify assets related to an active Ultra Task, the Snaplex restarts the pipeline instances automatically.
In these cases, even if only one instance per Snaplex is configured, more than one instance might be running simultaneously for a temporary brief period of time and will eventually be consistent once the activities settle down. The pipeline must be designed correctly to handle this case as the exact number of instances running at a time is not guaranteed.
Configuring the number of instances
When you create an Ultra Task, you have the option to load balance processing across nodes. The number of instances controls how many pipelines are started to process the Ultra requests. Since the pipelines are automatically started and are always running, the number of pipelines needs to be balanced. Having too many instances uses up slots, resulting in extra load on the node. The pipelines associated with the task will be automatically started and assigned to the execution nodes of a Snaplex. The assignments will attempt to evenly distribute them across each node. Having too few could result in delays for requests if the request volume is higher than running instances.
The FeedMaster queue depth reflects whether the instances are keeping up with the load. If the number of instances is keeping up with the load, the queue depth will be zero. However, if the number of instances cannot adequately handle the load, the FeedMaster queue will start increasing. When either of these events occurs, the number of instances can increase or decrease automatically to adjust to the load.
Manual per Snaplex
As a default option, this selection sets the number of pipeline instances to start, regardless of the number of JCC nodes. Use this setting in Ultra Tasks where the pipeline limits the number of concurrent calls from downstream systems.
For example: An Ultra Task calls a SOAP service and the service can process five API calls at one time, then set the number of instances to 5 for the Snaplex.
Manual per Node
This selection sets the number of pipeline instances per node. Use this setting when the request volume for the Ultra Task is consistently steady and there are no limits on the number of concurrent requests the downstream systems can handle. The input value is the maximum number of the instances. For example, setting the value to 2 will not guarantee 2 instances per node, but 8 instances total.
When specifying the number of instances to run, always consider that the Snaplex tries to distribute the instances across nodes on the Snaplex evenly. However, in some cases a Snaplex is overprovisioned with instances, resulting in a larger number of instances running simultaneously than the number configured.
Plan around the following activities:
- Changes to Snaplex nodes, such as a restart.
- Changes to the number of nodes in the Snaplex.
- Changes to the pipeline that the Ultra Task is invoking.
Example configuration for Low-latency Ultra
Setting the Instances per Node to 2 runs two pipeline instances on each Snaplex JCC node.
As another example, setting this to 4 would result in eight instances, starting with four pipelines running on each node.
Example configuration for Headless Ultra
We recommend that you establish the queuing based on pipeline testing. Adjusting this setting for Kafka-based pipelines.
For example, if JMS Consumer and Acknowledge Snaps are not configured properly and this setting is changed from the default, the pipeline could encounter errors. You can configure error handling pipelines with the appropriate logic to handle duplicate messages as part of your design.
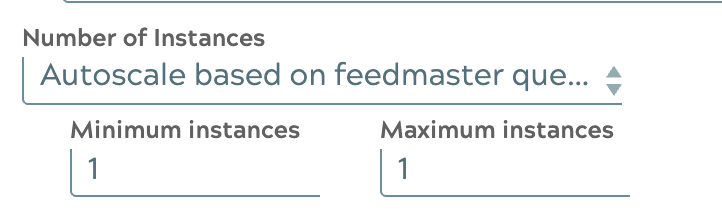
Autoscale based on FeedMaster queue
Scale the number of pipeline instances based on the number of requests being processed. This option can be used when the request rate is expected to be variable, with low and peak volumes being significantly different.
The autoscaling formula estimates the number of pipeline instances required for an Ultra Task by analyzing queue activity metrics received from the FeedMaster.
The formula collects a series of enqueue change samples, where each sample represents the difference in queue length between consecutive time intervals. The size of the sample window determines how much historical queue activity is used in the analysis.
Using simple linear regression, the formula calculates a trendline from these samples and records its slope. By comparing successive slope values, the formula determines the rate of change in queue growth — that is, how steeply demand is increasing or decreasing.
The setting that specifies the minimum and maximum number of instances per Snaplex determines the sensitivity of the scaling response: a lower maximum value limits scale-out and produces a more conservative response, while a higher maximum value allows the system to scale out more aggressively.
Based on the percentage change in slope and the configured instance range, the formula calculates the updated number of instances needed and applies the change to the Ultra Task.