


Configure Security Integration to use in Snowflake OAuth2 Accounts
Configure Security Integration in Snowflake
A Security Integration is a Snowflake object that provides an interface between Snowflake and SnapLogic that supports OAuth2. To configure your Snowflake OAuth2 account, you must first create a Security Integration in Snowflake.
Prerequisites
- You must be the ACCOUNTADMIN, or.
- You must have a role with the CREATE INTEGRATION privilege to create and manage integrations for OAuth.
- Run the following statements to set up the user authorizing the
tokens:
ALTER USER <username> ADD DELEGATED AUTHORIZATION
         OF ROLE SYSADMIN
         TO SECURITY INTEGRATION <integration_name>
- Log in to Snowflake.
- Enter the following command in the Snowflake Console:
CREATE OR REPLACE SECURITY INTEGRATION <name of the integration>
TYPE = OAUTH
ENABLED = TRUE
OAUTH_CLIENT = custom
OAUTH_CLIENT_TYPE = 'CONFIDENTIAL'
OAUTH_REDIRECT_URI = 'https://elastic.snaplogic.com/api/1/rest/admin/oauth2callback/snowflake'
OAUTH_ISSUE_REFRESH_TOKENS = TRUE
OAUTH_REFRESH_TOKEN_VALIDITY = 7776000 <integer>
OAUTH_ALLOW_NON_TLS_REDIRECT_URI = TRUE;
Note: The Redirect URI should be set to a specific endpoint (within SnapLogic) that handles the OAuth callbacks for the Snowflake Snap Pack. - Click Run to run the command. In the preview panel,
you can see that the OAuth client ID is generated.
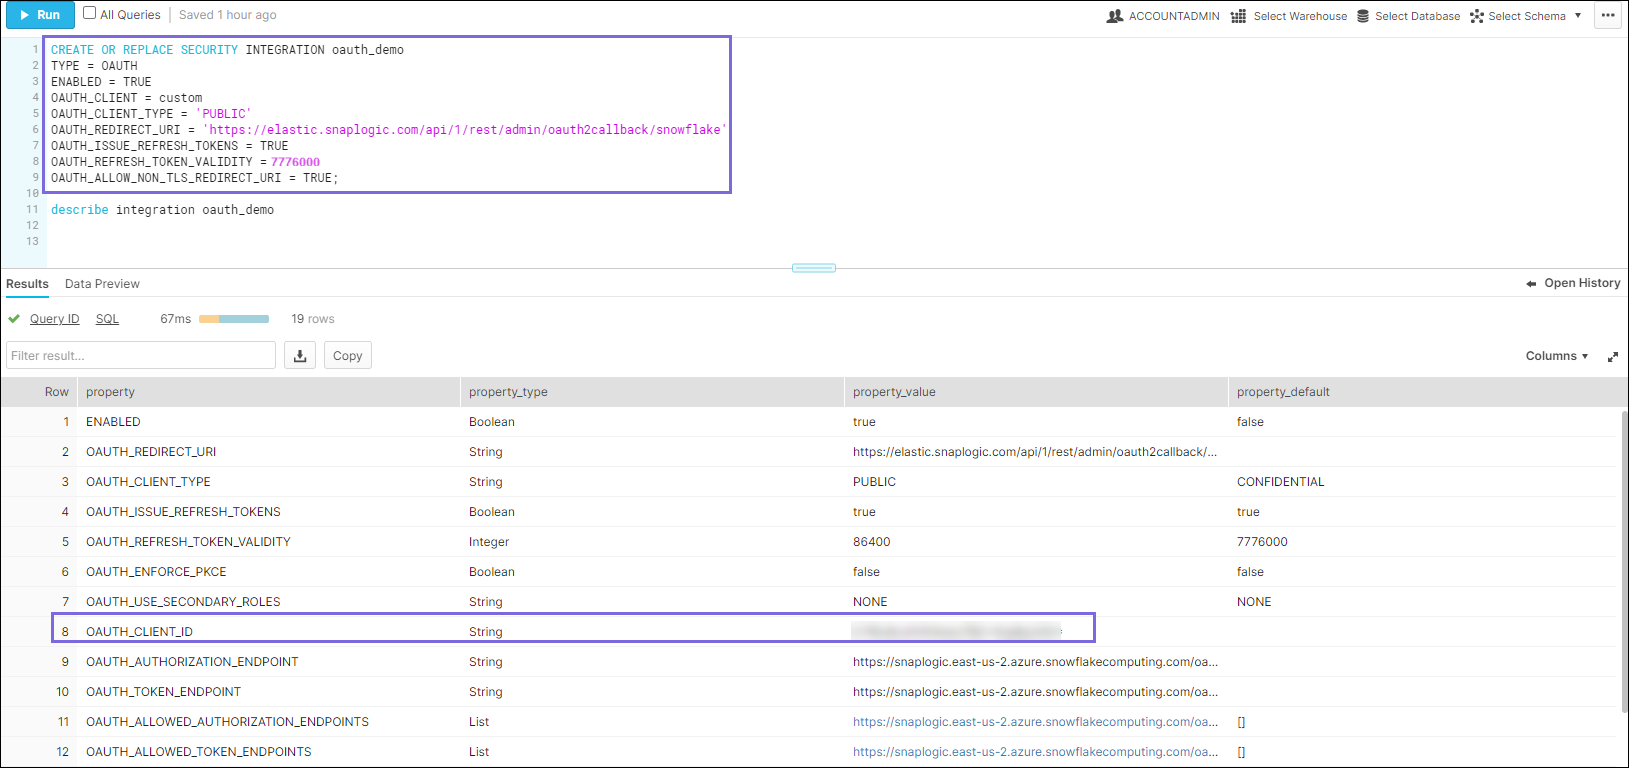
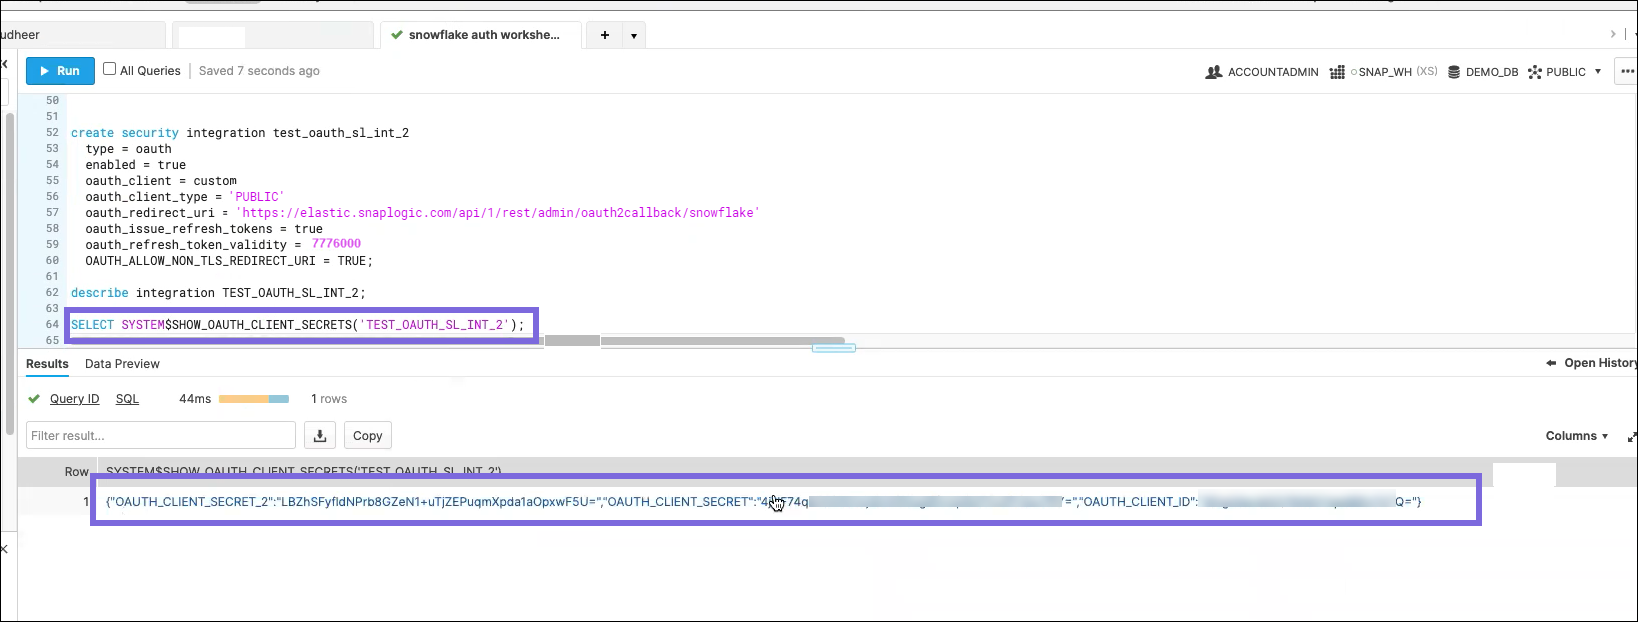
- To generate the OAuth client secret, enter the following command:
SELECT SYSTEM$SHOW_OAUTH_CLIENT_SECRETS ('TEST_OAUTH_SL' <name of the integration>)Note: You must specify the integration name in upper case, else the commandSHOW_OAUTH_CLIENT_SECRETSfails if you create the integration without using quotes.Note: Quoted Identifier Rules for Integration NamesFor instance, if the Security Integration name is
"Snaplogic_security_Integration"(where double quotes are part of the syntax of theCREATE SECURITY INTEGRATIONcommand, then:- When you use a quoted identifier and the name is in mixed case,
you should enter the command as shown below for it to work.
SELECT SYSTEM$SHOW_OAUTH_CLIENT_SECRETS
                                        ('Snaplogic_security_Integration')
If you enter the command as shown below, then it would fail.
SELECT SYSTEM$SHOW_OAUTH_CLIENT_SECRETS
                                            ('SNAPLOGIC_SECURITY_INTEGRATION')
- When you use a quoted identifier and the name is in mixed case,
you should enter the command as shown below for it to work.
- Click Run. The OAuth Client Secret is generated for
the given integration.
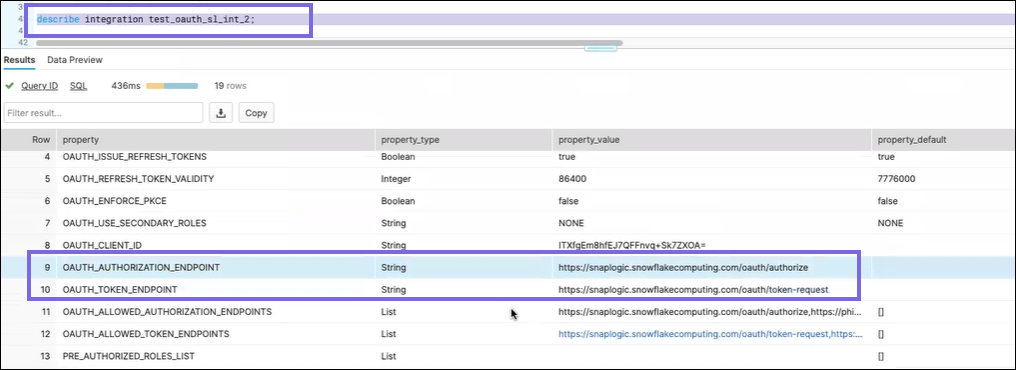
- Enter the
DESCRIBE integration test_oauth_SL <integration
                            name>
command in your Snowflake Console. - Click Run. The OAuth authorization and token
endpoints are generated.
Specify the values required to create a successful Snap OAuth2 account connection.
- Navigate to the Snowflake Snap of your choice and set up the SnapLogic
Snowflake Azure/Google Cloud Storage/S3 OAuth2 Account with the following details:
- Client Id: Provide the client ID that you have generated in Snowflake.
- Client Secret: Provide the client secret that you have generated in Snowflake.
- Token Endpoint Configuration
- OAuth2 Endpoint:
https://xyz123.snowflakecomputing.com/oauth/authorize
(https://<account_identifier>.snowflakecomputing.com/oauth/authorize) - OAuth2 Token:
https://xyz123.snowflakecomputing.com/oauth/token-request
(https://<account_identifier>.snowflakecomputing.com/oauth/token-request)
- OAuth2 Endpoint:
https://xyz123.snowflakecomputing.com/oauth/authorize
- Click Authorize. You will be redirected to the login
page of Snowflake.
- Log in to Snowflake and accept the permissions. The authorization code is generated and supplied to the callback (Redirect) URL, after which, the Access token is issued.
- Select the Auto-refresh token checkbox and save the account.